 |
Levels |
 |
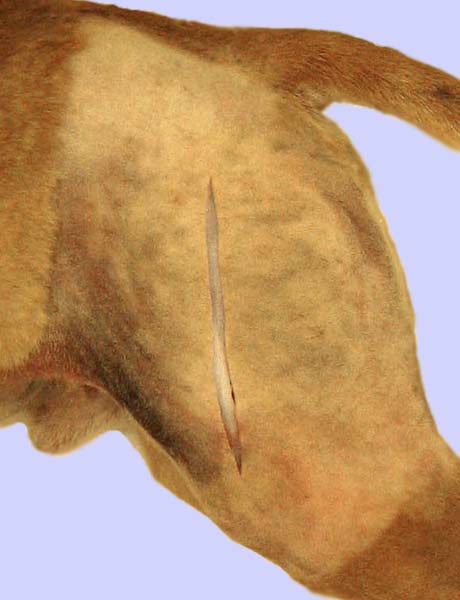
This series of images depicts the exposure on a cadaver limb. Remember that these are images from a region with normal anatomy – in the trauma patient there will be much swelling and hemorrhage possible, obscuring your view. The skin incision (arrow) is made in the craniolateral femoral region, from the hip (1) to the stifle (2).
After incising the subcutaneous tissue identify the fascia lata (1) located at the cranial border (arrow) of the biceps femoris muscle (2). The fascia lata will be incised close to the biceps femoris muscle.
Retract the biceps femoris m. caudally (1). Notice the vastus lateralis muscle (2) deep to the fascia lata (3) and cranial to the femur. The vastus lateralis muscle will be retracted cranially off the femur.
The femur (1) is easily viewed at this point. In this image the incision has been extended further proximally and distally from what would be needed during a typical surgical repair. The retractor is holding the vastus lateralis muscle (2). The clamp is holding the biceps femoris muscle (3).
In this image the retraction is maximized to allow for visualization of the sciatic nerve (1) caudal to the femur (asterisk). It is critical to identify this nerve as early as possible to avoid unnecessary manipulation or damage from accidental trauma from the retractors or worse yet incising through it. In addition to the vastus lateralis muscle (2) and the biceps femoris muscle (3), another muscle can be seen attaching to the caudomedial surface of the femur – the adductor muscle (4). This muscle should be left attached to the femur (i.e. don’t scrape it off the bone). The adductor m. supplies blood to the periosteum of the femur – a big help when the fracture is healing!